Bullet Points in Excel
This page illustrates 4 ways to insert bullet points in Excel. You can use a keyboard shortcut, insert a symbol, create a custom number format (our favorite) or use the CHAR function.
Keyboard Shortcut
If you have a number pad on the right side of your keyboard, use these keyboard shortcuts to add bullet points.
1. To insert a filled round bullet point, press Alt + Numpad 7.

2. To insert a hollow round bullet point, press Alt + Numpad 9.

Symbol
If you don't have a number pad on the right side of your keyboard, execute these steps to add bullet points.
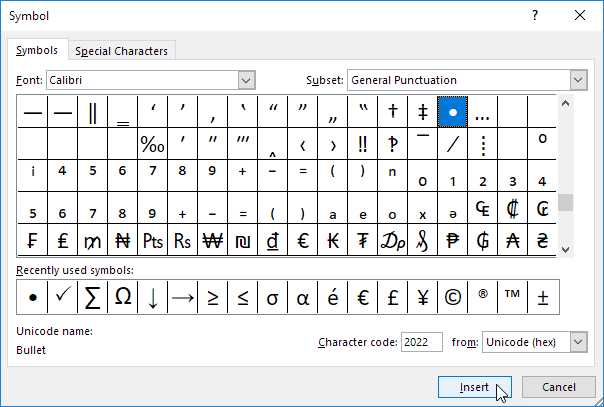
1. On the Insert tab, in the Symbols group, click Symbol.

2. Select a font from the drop-down list, type 2022 in the Character code box and click Insert.

Result:

3. To insert multiple bullet points in a single cell, press Alt + Enter to start a new line in an Excel cell.

Custom Number Format
Create a custom number format, and inserting a bulleted list in Excel will be a piece of cake!
1. Select the range A1:A3.

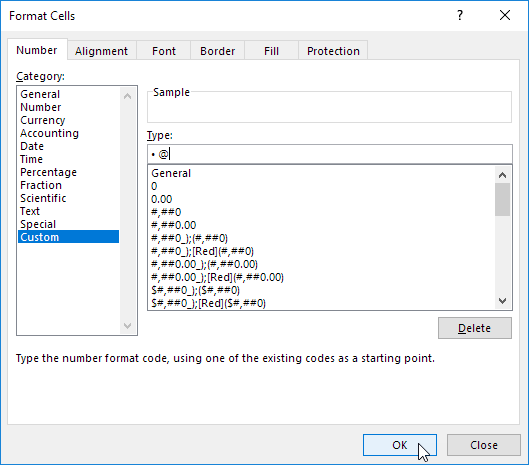
2. Right click, and then click Format Cells.
3. Select Custom.
4. In the Type box, press Alt + Numpad 7 to insert a bullet point (or copy/paste a bullet point), enter a space and type @
5. Click OK.

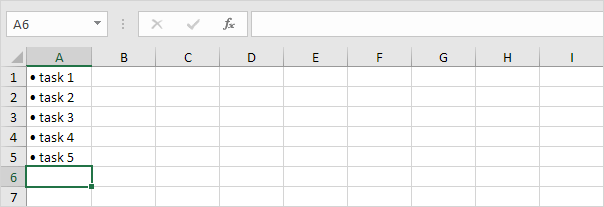
6. You can now create a bulleted list by simply typing the list items. Excel automatically adds the bullet points!

Note: use the Format Painter to quickly copy the bullet point format to a different section on your worksheet.
CHAR function
You can also use the CHAR function to add bullet points in Excel.
1. The formula =CHAR(149) adds a bullet point to a cell.

2. Use the & operator to concatenate the CHAR function with text to create a bulleted list.

Tip: to quickly convert this bulleted list, which consists of formulas, into a range with static values, check out the trick explained on this page (step 4).